Well turns out , after voting- I won the challenge.!I gotta say I am really happy about this! Really enjoyed making it and so it was very nice to win. here is the link.
Lost Concept Challenge Here are the final maya and zbrush renders that I submitted. Had some good advice for the sack and it did improve, but I think its not there. Didnt get enough fine detail into it. Will always think to do a proper lit and textured version, but you never know. Had a great time with this, good to get some rest now. I will watch the voting over at cgfeedback to see how I do.
Right so work continues on this piece, here some un-smoothed renders.Got most of the geo I want done. Now its time to take the sack into Zbrush, I am hoping to finish the sack sculpt tonight which then will leave me one night to final it all, tweaks, renders etc.
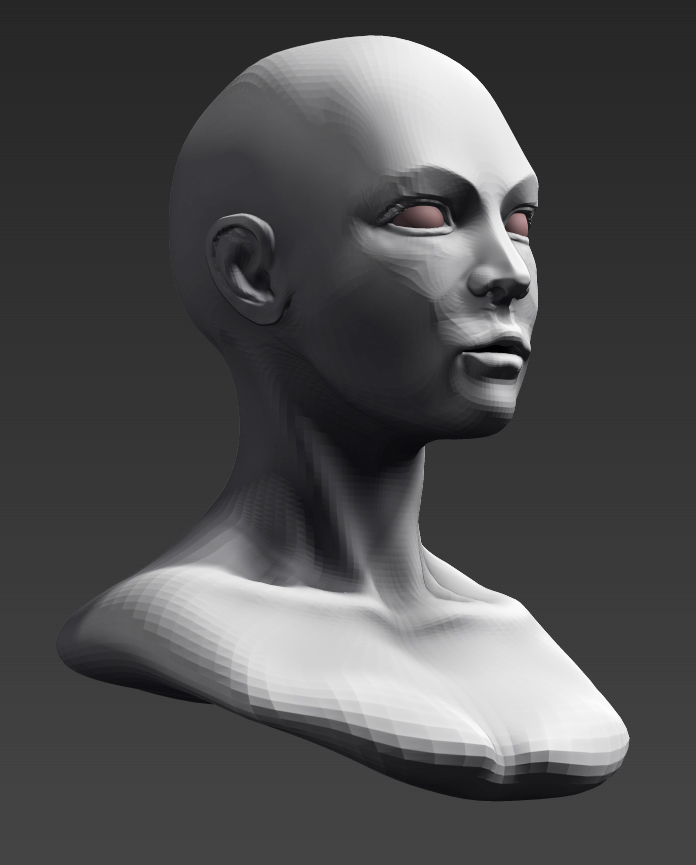
When I did the pin up challenge I was never that happy with the face. And I did some work for the woman with M.A.k machine but that still needs work. So I been working on this slowly, really slowly. I found it was really good to make the planes for the face, quite like how it looks like this, but not sure how to more forward. Sure it will happen. Be nice to finish so I can attach to bodies.
Going to do the challenge over at cgFeedback. Chose this one by Christian Pearce. Its a cloning tech thing, from District 9. Did a quick colour in to see what I need to make and figure out the tubes. Will be cool to make as its hard surface and some organic.
First look at one of the new shots I have made to replace an old shot that caused me no end of trouble. Just getting the shot together. Have more animation to do yet.
I have been looking at the sand in some of shots and finding it a little dull. So to address this, I tried to take the mesh into Zbrush and work it up.Wanted to keep it lose and have fun with it. Here is frame of what I got. When I first started on the film I could not see a good way to work this sand up, not with the resources that I have. And it wasn't till Decimation Master came out for Zbrush 3.5 that I could see a way.Really helps to give the characters of feeling of being in the world, rather than walking on it. Now I dont think I am going to animating this ground, its very heavy, so have will to choose where I put it carefully.
During my last year at Yukfoo, a collegue approached me to do some outsourcing for a Wii game that he was Art Director on, California Sports. This was possible to do as I had game experience and we had a team that I knew could do it. I did the initial benchmark assets, such as the first character and building and worked out the kinks of how we were going to do this. Once that was done I just had to run schedule and do a bit of quality control. SHOo did the all the character texturing and Yoshi Harimaoto did the rest of modeling and most of the texturing on the props. I thought they did a great job as it was alot of assets in short amount of time.And there is another whole phase that I had nothing to do with.
A post of my latest model. This one I am going to texture finally. And I am also going to be adding a character. This helps to give the bot a sense of scale. The first section of renders are ones I did to check that the mesh is good and that the smooth approximation will work right. Down below this are the renders with the character in. As I thought it changes the perception of the model hugely.
So its a while since I posted an update to the film.I have done alot of work on it lately. So here is an update. I finally got around to unwrapping the interior of the house and started to texture that up. Makes a big difference. Still planning to let SHOo cut loose on those textures. The majority of my time has spent on animation. Tackling shots that I being avoiding. I have also reworked a shot that I could never render and was struggling with. I broke it into 2 shots now. Done plenty of comp work on various shots. And I have changed the ending! I have said that I would never change the edit..but it had to be done.
I got my update to Zbrush 4.0 going last night. I needed to get a larry render out. Going into maya with decimated geo is not much fun really. So I wanted to try this BPR rendering out and get a turntable done. I spent most of my time setting the SSS that you can now hook up in zbrush. I just hooked up my painted ED map to the texture and used a preset. Its not perfect by a long way, but I can see this will be getting plenty of attention.
Back to Larry.. This has a long way to go.I wanted to focus in particular on painting the SSS layers in zbrush and detailing the skin. Here are my wips so far. The lower wips was my first renders out of maya but I was not mad about it, the upper one has everything tweaked.They are both using the same maps on the SSS but I did some work on the eyes texture and a blockout of his outfit. I have to rework some of detailing and change the coloring of the skin, but for now I am looking at the general feel of the maps. Also in the piece I decided to get some hair renders. I have used the fur a fair bit, but always avoided the hair and it can be more trouble than its worth. But for this I think it will be the right way to go.
I did some more work on the pin up. I wasn't able to get everything right in time for the challenge. Main area of work was sculpting the face, so I made her more expressive. I did some adjustments to the feet, legs and fingers. I did some touch ups to the rendering, softened the shadows, moved some lights,and made some eyelashes.Really had a good time with this and can't wait to start my next one.
Here is my final image for the challenge. I am pretty happy with how this came out. It was great to finally make a female body, and a pin up. I have been wanting to do a pin-up for ages so the challenge was a good excuse to get it done. I would like to think that I will do some more Pin-ups in the future.
Test render for the Challenge over at cgfeedback. Its on 50's Pin ups. I have a few days left yet to finish this. The sculpt here is the pose, gesture only I have a day of sculpting ahead of me.
Here are some practice sketches. Parts of the face this time. I have the excellent book Portrait Sculpting by Philippe and Charisse Faraut, so thisme working through this book.
So with the release of Avatar on DVD(not the best quality..) I can get my hands on the shots I was lighting TD on, here they are! WHOoA! Amazing right?.If you are watching the film there is a section called Quaritch Fight, this was sequence I was assigned to, and these shots are from it. As this was my first film, I was very happy to get to run 3 shots.All the assets were unreal,hard to light them badly. Good times. Avatar copyright 20th Century Fox.
Decided to try a new light setup for Larry. I found the old one, which was good on the Krieger work lacked somewhat in feeling. It didn't pull any details out. This setup is an improvement, sculpts out the form and is more reflective of the character personality.
Little bit about myself.In a previous life I was a chef. I was lucky to work with great people and learnt how to cook.I however it was my not great love, and after many years in hot kitchens it was time to change. I went to animation school at Media Design School in Auckland in 2001 worked hard and managed to graduate with Distinction and an industry award for Modeling. I was then lucky enough to be picked from an international search to be the intern for the Art Department at National Geographic Magazine in Washington D.C. I was working with the art directors. It was a fantastic time.
I then taught 3D for awhile until I was hired at Binary Star, a start up game development studio as Lead 3D. This was a great year and with a top team we won Best Startup Studio and Best unsigned game at the Austrailan GDC.
After this I was drawn into the world of TVCs. I went to Yukfoo in Auckland as Lead 3D and am lucky to work with a great and talented bunch of people.
After this I went to Weta Digital as a Assistant Technical Director in the shots department working on Avatar. This was amazing, and culminated in running 3 shots for Avatar as Lighting TD.


